Bus2alps blue crew member Emily Carrello shares her experience and tips on finessing the ultimate Instagram aesthetic through travel photo editing. Her feed is #goals, so you’re gonna want to bookmark this post for later!
Ever wonder how those influencers get their travel photos looking oh so good? We’ve all been there – you traveled to Europe, you took the exact same photo, in the exact same location, and yet, it just doesn’t have that same glow. Is it luck? Are they all just blessed with incredible heavenly lighting everywhere they go? It sure would be nice to have access to all the flashiest photography gadgets or to have a spunky fashion photographer on hand capturing all our best angles (let’s be honest, we could all use a little more “yassss girl, work it!” in our lives). The truth is, you don’t actually need all that to take your photography to the next level. All you need is a phone camera and few basic editing skills to elevate that Insta feed!
Tip Number 1: Choose your editing apps wisely
There are so many photo editing apps out there to choose from these days. Chances are, you downloaded whatever free app shows up first in the app store. Be careful, a lot of free phone apps will significantly lower the quality of your edited photo, which can leave your travel pics looking grainy and blurred. Be sure to check the original and edited photos side by side to make sure your new edit looks clear and unpixelated. It sure would be a shame if we missed a single detail of that incredible Duomo shot you captured in Florence last year!
Spot the difference:
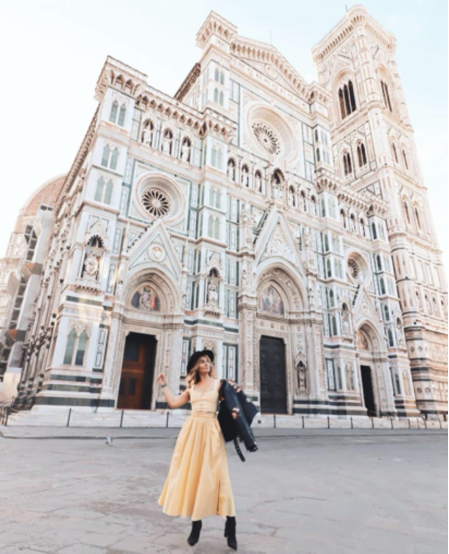
a) low-quality poor resolution
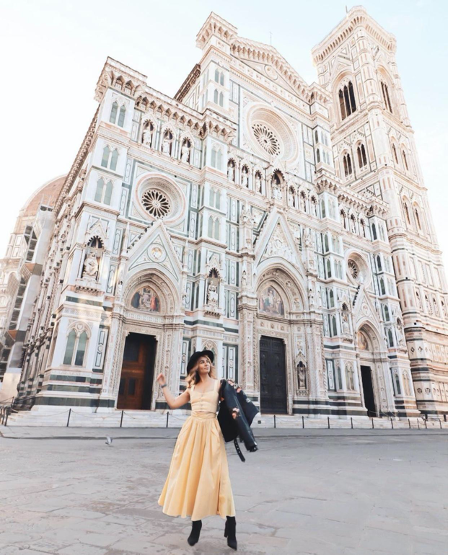
b) high-quality detail
If you’re really new to the photo editing game, maybe you’re just using the built-in editing app on your phone camera. Or worse, you’re still slapping one of those built-in Instagram filters onto your pics – stop it right there. The good news is you don’t need an expensive monthly subscription to Adobe Photoshop or a paid subscription of any kind to elevate your work. In fact, you can do all your photo editing right from your phone for free! Our pick – Adobe Lightroom Mobile App (free version). Rather than supply only a handful of pre-made filters that actually detract from the quality of your photo, the free mobile Lightroom app lets you manually work with light and color to achieve the look you’re going for. Your travel photos will come out looking unique and professional rather than tacky and over-edited.
Tip Number 2: Put the Mixer Tool to use
Within the Lightroom app, you’ll see all the usual editing tools such as contrast, brightness, saturation, etc. You’ll also notice under the color tool, on the top right corner, there is an option for “mix”. This tool is the best-kept secret for taking your travel photo editing to a whole new level! This tool allows you to play with the hue, saturation, and luminance (essentially brightness) of each color in the photo. So, for example, instead of cranking up the saturation on that entire Swiss Alps photo, making the sky look extremely unnatural, you can choose to accentuate just your red and orange hues.
Spot the difference:

a) original

b) all colors saturated

c) red/orange saturated
Tip Number 3: Find your unique style and make your feed cohesive
Once you get used to using the Lightroom app you’ll discover there are endless possibilities for your photo editing. By all means, play around with each of the tools and try out different styles on your travel photos. Maybe you’re editing a collection from your recent travels to Budapest and you’re going for moody and muted. Or perhaps you’re leaning towards light and airy for your latest love affair with Paris. Once you find the editing style that fits your mood, make sure to keep all your edits the same for a particular collection of travel photos. This will help keep your Insta feed looking polished and cohesive! The easiest way to ensure your edits are all the same is to use presets, which leads us to our next tip…
Tip Number 4: Create your own presets
You may have heard the term preset used before. So what is it exactly? Presets are similar to filters in that they can be applied to multiple photos giving them all a corresponding color profile and creating a collection of photos with an overall cohesive look. Once you’ve found your unique editing style, you don’t have to start from scratch every time you go to edit a new photo. In the Lightroom app, on the top right corner of your photo, you’ll see a circle with three little dots. This menu gives you the option to “create preset.” Once you create your preset, you’ll be able to instantaneously apply those color and light settings to any photo. Unlike filters, however, presets aren’t just a one-and-done overlay.
The best thing about them is that the specific settings within your preset can be easily tweaked for each photo. This really gives you as the photographer complete control over your photo editing. For example, you want your collection of photos from your recent trip through Seville to look cohesive. You apply your “Seville” preset to each, but you notice that your orange jumpsuit looks red in the photos taken in lower light. Don’t fret – just go back into your “mix” setting and tweak the “hue” of red for those photos.
Spot the difference:

a) original
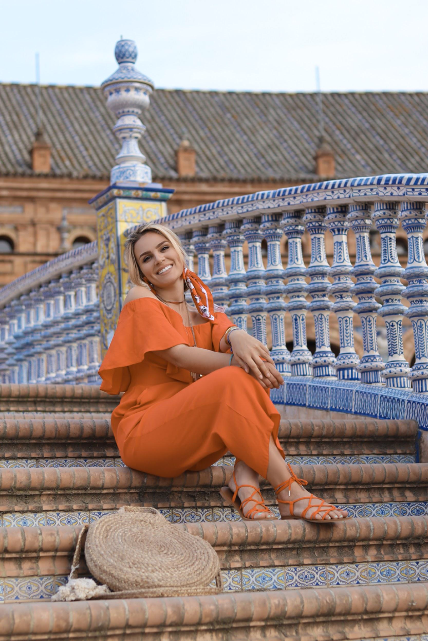
b) red hue adjusted
Bonus Tip: Lighting, camera, action!
The best editing starts with the best photography. What’s more important for a quality photo than expensive equipment? Good lighting! Your photos will be easier to edit and come out 100% better if you focus on capturing your subjects in good lighting. For beginner photographers, it’s best to avoid taking a backlit photo (this means the sun is behind the subject and shining right into the camera lens). Backlighting will make your photos much more difficult to edit and the colors will likely look washed out. In the same light (no pun intended), it’s also not a good idea to take photos in full shadow either. Try to position yourself in a place where the light hits your subject directly or at a front angle.
The other obvious must for capturing quality photos is a high megapixel camera. Yes, I know we said no fancy equipment necessary, and it’s not! Most newer phone cameras have enough megapixels for you to capture a high-resolution photo that will be clean and crisp enough for your Instagram needs. If you’re planning on printing your photos or displaying your work on a larger scale, it’s a good idea to invest in a DSLR or mirrorless digital camera. There are plenty on the market to fit all budgets!
So there you have it! The secret to editing your travel photos like a pro. No fancy equipment and no expensive editing apps required. Go ahead try it out! If you use these tips feel free to tag us (@bus2alps_travel) in your Europe travel photos for a chance to be featured on our page. We can’t wait to see you put your new skills to use!


